How To Check 4 Pin Relay
Key Takeaway
To check a 4 pin relay, first set your multimeter to the ohms setting. Measure the resistance between the coil pins, typically labeled 85 and 86; a proper resistance value indicates the coil is intact. Next, measure the resistance between the switch pins, labeled 87 and 30; without power, this should show an open circuit. Apply power to the coil pins (85 and 86), and the resistance between pins 87 and 30 should show continuity. This indicates the relay is functioning correctly. This simple test ensures your relay operates properly and is ready for use.
Identifying the Components of a 4 Pin Relay
A 4 pin relay consists of four essential terminals: two for the coil (85 and 86) and two for the switch (30 and 87). Terminal 85 typically connects to ground, while terminal 86 connects to the control switch or signal source. Terminal 30 is the common terminal, which connects to the power source or load, and terminal 87 is the normally open contact that closes when the relay is energized. Understanding these components is the first step in testing and troubleshooting the relay.
Step-by-Step Guide to Testing a 4 Pin Relay
Testing a 4 pin relay involves a few straightforward steps. Start by setting your multimeter to the ohms setting. Connect the multimeter leads to terminals 85 and 86, which are the coil terminals. You should see a resistance reading between 50 and 200 ohms, indicating that the coil is intact. If the reading is outside this range, the coil may be damaged.
Next, switch your multimeter to the continuity setting. Place the leads on terminals 30 and 87. Without applying any voltage to the coil, there should be no continuity between these terminals. This step checks that the switch is open when the relay is not energized.
Now, apply the appropriate voltage to the coil terminals (85 and 86). This action should energize the relay. Once the relay is energized, check for continuity between terminals 30 and 87 again. This time, there should be continuity, indicating that the internal switch has closed and the relay is functioning correctly.
By following these steps, you can effectively test the coil and switching mechanism of a 4 pin relay. This method ensures that your relay operates as expected, providing reliable performance in your electrical systems. Regular testing and maintenance are crucial for long-term reliability and efficiency.
Tools and Techniques for Effective Relay Testing
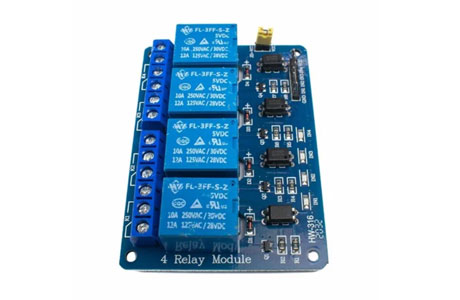
To test a 4 pin relay effectively, you’ll need a multimeter and a power source that matches the relay’s voltage rating. The multimeter is essential for measuring resistance and checking continuity. Start by setting your multimeter to the appropriate range for accurate readings. For larger setups or when coordinating multiple devices, consider using a 4 relay channel board, which facilitates simultaneous control and testing across multiple channels, enhancing both setup efficiency and diagnostic capabilities.
For continuity testing, use the multimeter to check the connection between terminals 30 and 87. Without voltage applied, there should be no continuity. Applying voltage to the coil terminals (85 and 86) will energize the relay, and you should then find continuity between terminals 30 and 87, indicating the relay switch is functioning properly.
Ensure your power source is stable and matches the relay’s voltage requirements to avoid damaging the relay. Using alligator clips can help make secure connections to the relay terminals during testing, reducing the risk of short circuits or inaccurate readings. Proper tools and techniques ensure accurate testing and reliable operation of your relays, enhancing the efficiency and safety of your electrical systems.
Interpreting Test Results and Troubleshooting
When testing a 4 pin relay, interpreting the results accurately is crucial for effective troubleshooting. Start by measuring the resistance between terminals 85 and 86. If the resistance falls outside the expected range (usually 50-200 ohms), it indicates a damaged coil, necessitating relay replacement.
Next, check for continuity between terminals 30 and 87 without applying voltage. If there is continuity, the relay might be stuck in the closed position, suggesting a need for cleaning or replacement. Conversely, if there is no continuity when the relay is energized, it indicates the relay is not switching properly. This could be due to coil failure or internal mechanical issues, both requiring attention.
By systematically checking these parameters, you can pinpoint the exact issue with the relay. Accurate interpretation of these results ensures that you can take the appropriate action, whether it involves cleaning, repairing, or replacing the relay. This methodical approach helps maintain the reliability and functionality of your electrical systems, preventing potential failures and ensuring smooth operation.
Best Practices for Maintaining 4 Pin Relays
Maintaining 4 pin relays involves regular inspections and preventive measures to ensure optimal performance and longevity. First, keep the relay and its connections clean to prevent dust and debris from interfering with the contacts. Regularly test the relay as part of your maintenance routine to catch potential issues early. It’s essential to ensure the relay is not exposed to excessive heat or moisture, as these conditions can degrade its performance.
Using a relay with appropriate ratings for your specific application is crucial. This prevents overloading and premature failure. Additionally, periodically checking for signs of wear or damage, such as corrosion on the contacts or burn marks, can help in early detection of problems. Cleaning the contacts periodically to prevent buildup ensures reliable operation.
By following these best practices, you can maintain the relay’s longevity and reliability, thereby ensuring the smooth operation of your electrical systems. Regular maintenance and proper handling of relays help in preventing unexpected failures and enhancing the overall efficiency of your circuits.
Conclusion
Regular testing and proper maintenance are key to ensuring the functionality and durability of 4 pin relays. By understanding the relay’s components, using appropriate testing tools and techniques, and interpreting test results accurately, you can effectively troubleshoot and maintain these critical components in your electrical systems. Adopting best practices for relay maintenance not only enhances the relay’s lifespan but also contributes to the overall reliability and efficiency of your circuits.