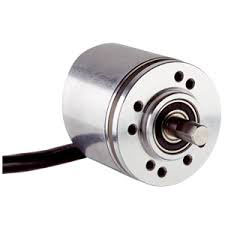
How Do You Calibrate An Encoder For High-Precision Applications?
Key Takeaway
To calibrate an encoder for high-precision applications, follow a structured process. First, ensure the encoder is correctly installed and connected to your system. Then, use calibration tools like a signal analyzer or a reference standard to fine-tune the encoder’s output. This ensures the feedback matches the actual movement in your application.
Different encoders may require specific techniques, but always use the manufacturer’s guidelines for best results. Maintaining regular calibration checks is crucial for high-precision systems, as it helps preserve accuracy over time and ensures optimal performance.
Importance of Encoder Calibration in Precision Applications
Encoder calibration is a critical process in ensuring the accuracy and reliability of motion control systems, especially in high-precision applications such as robotics, CNC machining, and aerospace systems. Calibration ensures that the encoder’s output matches the actual position, speed, or angle of the component it is measuring. Without proper calibration, even the highest-quality encoders can produce inaccurate readings, leading to performance issues, reduced precision, and potential system failures.
In precision applications, where even minor discrepancies can lead to significant errors, regular calibration helps maintain the accuracy of the system. Calibration compensates for factors such as mechanical wear, temperature variations, and signal drift, which can all affect the encoder’s performance over time.

Step-by-Step Guide to Calibrating Encoders
Calibrating an encoder involves several key steps to ensure that it provides accurate feedback to the control system. Here’s a general guide to the process:
1. Define Calibration Requirements
Before starting the calibration, it’s essential to define the accuracy requirements for the system. Determine the level of precision needed for the application, whether it’s position, speed, or angle control. This helps in selecting the right calibration tools and techniques.
2. Secure the Encoder and Equipment
Make sure the encoder is properly mounted and secure to avoid any movement during the calibration process. Any vibrations or shifts during calibration can affect the accuracy of the results. Additionally, ensure that all cables and connections are secure.
3. Set Up Calibration Equipment
Depending on the type of encoder, set up the appropriate calibration equipment, such as a calibration jig or reference measurement system. This may include using a laser interferometer or a precision dial gauge to measure the actual movement of the system. Connect the encoder to the calibration system and the controller to monitor its output.
4. Zero the Encoder
Most encoders require setting a zero or reference point. Rotate or move the object the encoder is measuring to the starting position, then instruct the encoder system to set this position as the zero point. This ensures that all subsequent measurements are referenced correctly.
5. Compare Output to Reference System
Move the system through its full range of motion while comparing the encoder’s output to the reference measurement system. Note any discrepancies between the actual movement and the encoder’s reported movement. For example, if the encoder is measuring angular displacement, rotate the object through a known angle and compare the encoder’s reading to the expected result.
6. Adjust Encoder Settings
If the encoder’s output does not match the reference system, adjust the encoder’s gain, offset, or scaling factors until the readings align. Some encoders have built-in software or manual adjustments that allow for fine-tuning the output. Continue to test and adjust until the encoder provides accurate feedback throughout its range of motion.
7. Validate Calibration
Once the adjustments have been made, perform a final validation by moving the system through its full range again, ensuring that the encoder’s output matches the actual movement with the required level of precision. Record the calibration results for future reference.
Common Calibration Techniques for Different Types of Encoders
Different types of encoders require specific calibration techniques based on their design and application. Here’s a look at some common methods:
1. Incremental Encoders
For incremental encoders, calibration often involves verifying the number of pulses per revolution (PPR) and ensuring that the encoder provides consistent pulse output throughout its motion. The calibration typically focuses on aligning the encoder’s pulse count with the actual movement.
2. Absolute Encoders
In absolute encoders, calibration involves ensuring that the encoder’s absolute position values correspond to the actual position of the system. Since absolute encoders provide a unique value for each position, calibration ensures that these values are accurate across the entire range of motion.
3. Rotary Encoders
Rotary encoders, commonly used to measure angular displacement, require calibration to ensure that the output accurately reflects the rotation of the object. This typically involves comparing the encoder’s angular readings with a known standard, such as a precision rotary stage.
4. Linear Encoders
For linear encoders, which measure linear displacement, calibration involves moving the system along a known linear path and comparing the encoder’s output to the actual distance traveled. Laser interferometers are often used to provide highly accurate reference measurements for linear encoders.
Tools Required for Accurate Encoder Calibration
Accurate calibration requires the right tools to ensure precision. Here are some essential tools commonly used for calibrating encoders:
1. Laser Interferometer
A laser interferometer is a precision instrument used to measure distance, displacement, and position with extreme accuracy. It is commonly used in the calibration of both rotary and linear encoders due to its ability to provide a highly accurate reference measurement.
2. Calibration Jigs
Calibration jigs are mechanical setups designed to hold the encoder and associated equipment in place during the calibration process. These jigs help ensure stability and prevent movement that could affect the accuracy of the calibration.
3. Dial Gauges
A dial gauge is used to measure linear displacement in applications requiring high precision. It provides a reference measurement for the encoder’s output, allowing for comparison and adjustment.
4. Software Tools
Many encoder manufacturers provide calibration software that assists with fine-tuning the encoder’s output. These tools allow for real-time monitoring of the encoder’s performance and adjustment of gain, offset, and scaling factors.
5. Oscilloscope
An oscilloscope can be used to monitor the encoder’s signal output during calibration. This helps identify any issues with the signal quality, such as noise or distortion, that may affect the calibration process.
Best Practices for Maintaining Calibration Over Time
After calibration, maintaining the accuracy of the encoder is crucial for continued high-precision performance. Here are some best practices for ensuring long-term calibration stability:
1. Schedule Regular Calibration Checks
Encoders, especially those in high-precision applications, should be calibrated periodically to ensure continued accuracy. The frequency of these checks depends on the application, environmental conditions, and the encoder’s usage.
2. Monitor Environmental Factors
Factors such as temperature, humidity, and vibration can affect the performance of encoders over time. Ensure that the encoder is installed in an environment that minimizes these influences, and use environmental compensation techniques, such as temperature compensation, when necessary.
3. Keep Equipment Clean and Well-Maintained
Dirt, dust, and mechanical wear can degrade the performance of encoders, leading to calibration drift. Regularly clean the encoder and its components, and replace any worn parts to ensure continued accuracy.
4. Use Reference Markers
Some encoders come with reference markers or index points that help verify their position during operation. Use these markers as part of your calibration process to ensure the encoder remains properly aligned over time.
Conclusion
Calibrating encoders is essential for maintaining high precision in motion control applications. Following a structured calibration process, using the right tools, and employing best practices for long-term maintenance ensures that encoders provide accurate feedback for high-performance systems. Regular calibration checks and proper system setup contribute to the overall reliability and accuracy of the encoder, ensuring optimal performance in demanding industrial environments.
