How To Detect Voltage In A Wire?
Key Takeaway
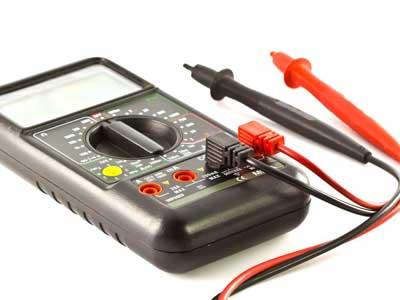
To detect voltage in a wire, you need a digital multimeter (DMM). First, turn the dial to the voltage setting (ṽ). Insert the black lead into the COM jack and the red lead into the VΩ jack. Then, connect the test leads to the circuit, starting with the black lead followed by the red lead. Once connected, read the measurement on the display. Ensure the power is on when testing for AC voltage and off when testing for DC voltage. This process helps you accurately measure the voltage in any wire, ensuring safety and functionality in your electrical systems.
Tools Needed for Voltage Detection
Detecting voltage in a wire is a fundamental skill for anyone working with electrical systems. Accurate voltage detection ensures safety and functionality in various applications, from home repairs to industrial maintenance. Let’s explore the tools, methods, and safety precautions required to detect voltage effectively and safely.
The primary tool needed for voltage detection is a digital multimeter, a versatile device capable of measuring voltage, current, and resistance. Ensure your multimeter is rated for the voltage levels you expect to encounter. Additional tools include insulated gloves, safety glasses, and a non-contact voltage tester, which is useful for an initial check to confirm the presence of voltage without direct contact.
Step-by-Step Guide to Using a Multimeter
Preparation: Begin by ensuring your multimeter is set to the correct mode for measuring voltage. If you’re measuring AC voltage, select the AC setting. For DC voltage, choose the DC setting. This is crucial for obtaining accurate readings and avoiding damage to your multimeter.
Setting the Range: If your multimeter does not automatically range, manually set it to a voltage range higher than the expected voltage. This prevents the multimeter from being overloaded and ensures it can display the voltage accurately.
Connecting Probes: Insert the black probe into the COM (common) jack and the red probe into the VΩ jack. This setup is standard for measuring voltage and ensures proper functioning of the multimeter.
Measuring: To measure voltage, touch the black probe to the ground or neutral wire and the red probe to the wire where you want to measure the voltage. Ensure the probes make good contact with the wires to get a stable reading. Look at the display to read the voltage.
Recording and Analyzing: Note the voltage reading displayed on the multimeter. Compare this reading to the expected values for the circuit to determine if everything is functioning correctly. Significant deviations from the expected values could indicate issues such as wiring faults or component failures. Recording these values helps in diagnosing and troubleshooting electrical problems efficiently.
By following these steps meticulously, you ensure accurate voltage measurements, which are essential for maintaining and troubleshooting electrical systems safely and effectively.
Safety Precautions When Detecting Voltage
Safety is paramount when working with electrical systems. Always start by turning off the power supply before connecting or disconnecting any measurement tools. This simple step can prevent accidental shocks or sparks that could cause injury or damage to the equipment.
Wearing insulated gloves and safety glasses is crucial for personal protection. Insulated gloves protect your hands from electrical shocks, while safety glasses shield your eyes from sparks or debris. It’s also essential to use tools with insulated handles to further minimize the risk of electric shock.
Ensure that your work area is dry to prevent electrical hazards. Water and electricity are a dangerous combination, so keeping your workspace dry is a basic but critical precaution.
Before you begin, double-check that your multimeter is functioning correctly and is rated for the voltage you are measuring. Using a multimeter that is not rated for the voltage in question can lead to inaccurate readings or even damage the device.
By following these safety precautions, you can ensure that voltage detection is performed safely and accurately, protecting both yourself and your equipment. Regular adherence to these practices fosters a safe working environment and helps prevent accidents and equipment failures.
Common Mistakes to Avoid
Avoiding common mistakes when detecting voltage can ensure accurate readings and safety. One critical mistake is using a multimeter on a voltage higher than it is rated for, which can damage the device and pose a safety risk. Always check the multimeter’s specifications before use to avoid this issue.
Ensure the probes are correctly inserted into the multimeter and securely connected to the measurement points. Incorrect connections can lead to inaccurate readings or no readings at all. Additionally, avoid touching the metal parts of the probes during measurement to prevent electric shocks.
Regularly inspect the condition of your multimeter and probes. Look for signs of wear or damage, such as frayed wires or cracked insulation. If any defects are found, replace the damaged components immediately to maintain safety and accuracy.
Another common mistake is not verifying the multimeter settings before taking measurements. Ensure that the multimeter is set to the correct mode for the type of voltage (AC or DC) you are measuring. Incorrect settings can result in erroneous readings.
By being mindful of these common mistakes, you can ensure your voltage detection tasks are performed safely and accurately. Proper handling and maintenance of your tools, along with careful attention to detail, will help you avoid potential hazards and ensure reliable results.
Interpreting Voltage Readings
Interpreting voltage readings correctly is crucial for diagnosing electrical issues and ensuring system functionality. When measuring AC voltage, ensure the reading aligns with expected household or industrial voltage levels. For example, typical household AC voltage is around 120V or 240V, depending on your location. Any significant deviation from these values could indicate wiring faults, loose connections, or issues with the power supply.
For DC voltage, compare the reading to the expected voltage of the power source, such as a battery or power supply. For instance, a fully charged AA battery should read around 1.5V. If the voltage is significantly lower, it might indicate a depleted battery or a problem in the circuit.
Unexpectedly high or low voltage readings can signal various issues. High readings might suggest overvoltage conditions, which can damage sensitive electronic components. Low readings might indicate resistance in the circuit, possibly due to corroded connections or broken wires.
Understanding these readings is essential for effective troubleshooting. Accurate voltage interpretation helps identify problems early, allowing for timely repairs and maintenance. This ensures the safe and efficient operation of electrical systems, whether in residential, commercial, or industrial settings.
Regularly interpreting and analyzing voltage readings as part of a maintenance routine can prevent potential electrical failures and enhance system reliability. Proper interpretation also aids in optimizing the performance of the electrical systems by ensuring all components operate within their specified voltage ranges.
Conclusion
Accurate voltage detection is essential for the safe and effective operation of electrical systems. By using the right tools, following proper procedures, and adhering to safety precautions, you can confidently measure and interpret voltage levels. Regular practice and vigilance in maintaining your tools and adhering to safety guidelines will ensure that your electrical projects are executed safely and accurately. This knowledge not only helps in troubleshooting and repairs but also in preventing potential hazards, ensuring a safer environment for all.